Rotation and Shape Gradients #
Overview #
Rotation and shape gradients create visual movement without only changing hole size. They are useful for decorative panels, product details, speaker covers, lighting screens, and patterns that need a stronger design direction.
Use these controls after you understand size gradients and layout settings.
Rotation Gradient #
A rotation gradient changes the angle of holes across the panel.
It works best with non-circular shapes, such as:
- Rectangles.
- Slots.
- Diamonds.
- Polygons.
- Stars.
Circles do not visually show rotation, so choose a shape with direction if you want the effect to be visible.
Create a Rotation Gradient #
- Choose a shape that shows rotation, such as a slot or rectangle.
- Open Gradient.
- Turn on Enable Gradient.
- Choose Angle in Gradient Dimension.
- Add a control point or gradient line.
- Adjust Center Rotation.
- Adjust influence radius or range.
- Choose a curve and reverse setting if needed.
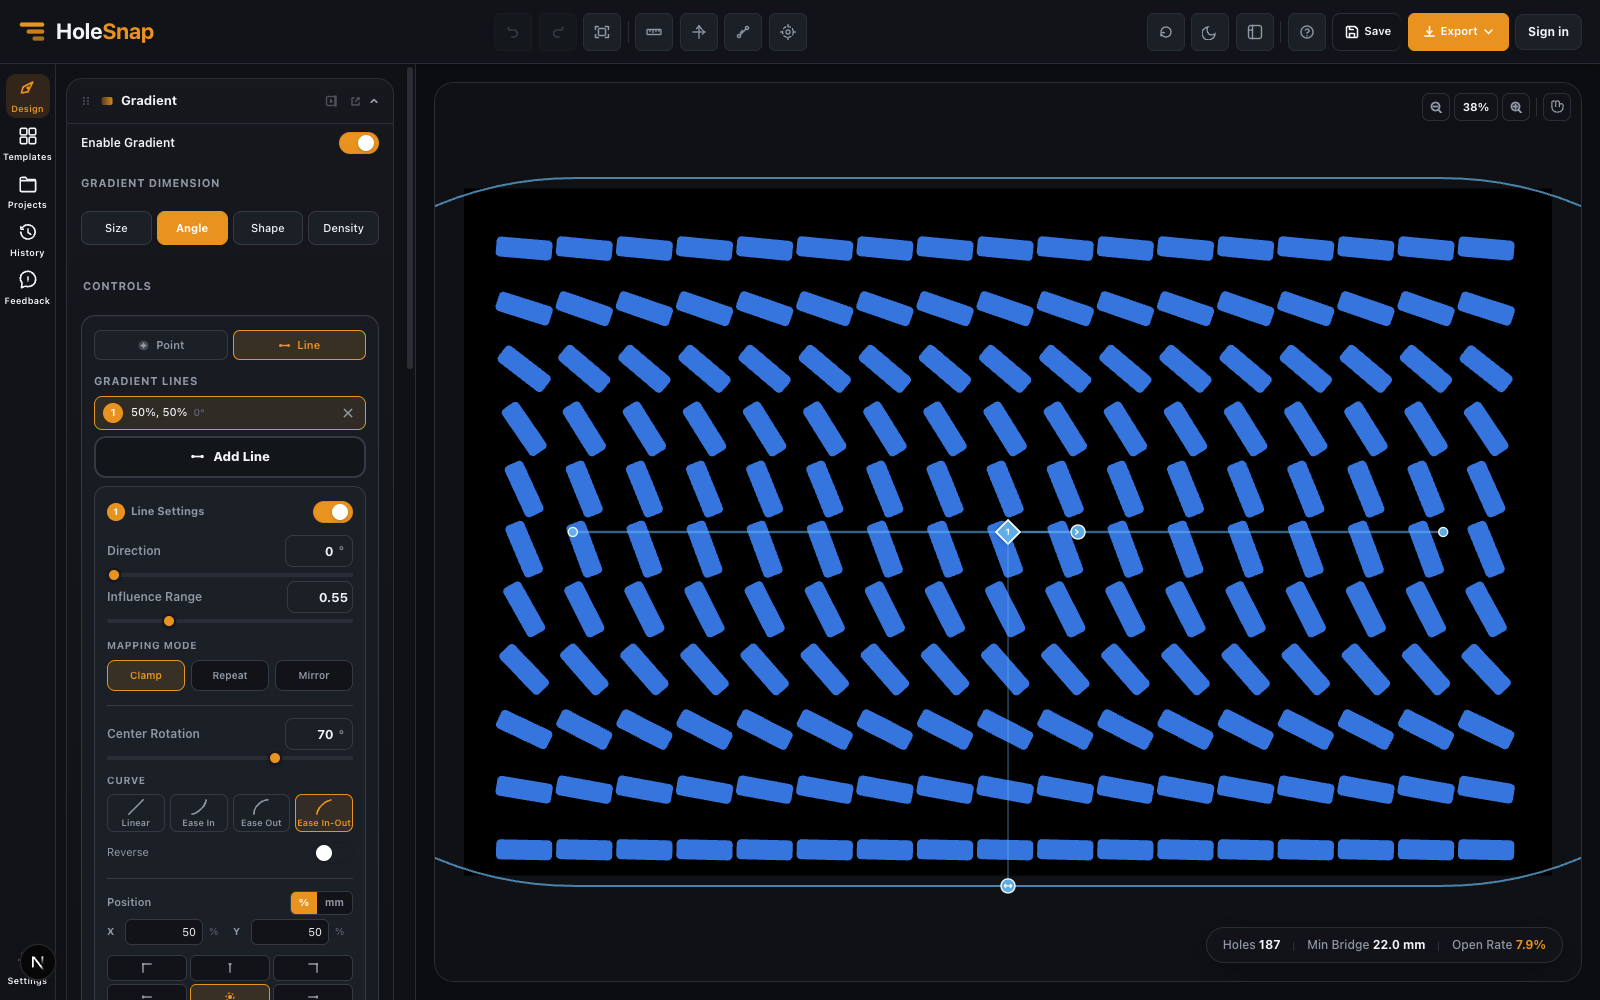
Use a line control for directional rotation. Use a point control for radial rotation around a focal area.
Rotation Gradient Tips #
- Use smaller angle values first, such as 15° to 45°.
- Check sharp corners after rotation.
- Watch for holes that rotate too close to neighboring holes.
- Use slots carefully because rotation can reduce bridge width diagonally.
- Keep export complexity in mind for dense decorative patterns.
Shape Gradient #
A shape gradient changes holes between a base shape and a target shape.
For example, a pattern can transition from circles to diamonds, rectangles, polygons, or stars.
In HoleSnap, shape gradients use a target shape. The base shape comes from the current Shape & Style settings, and the target is selected inside the Gradient panel.
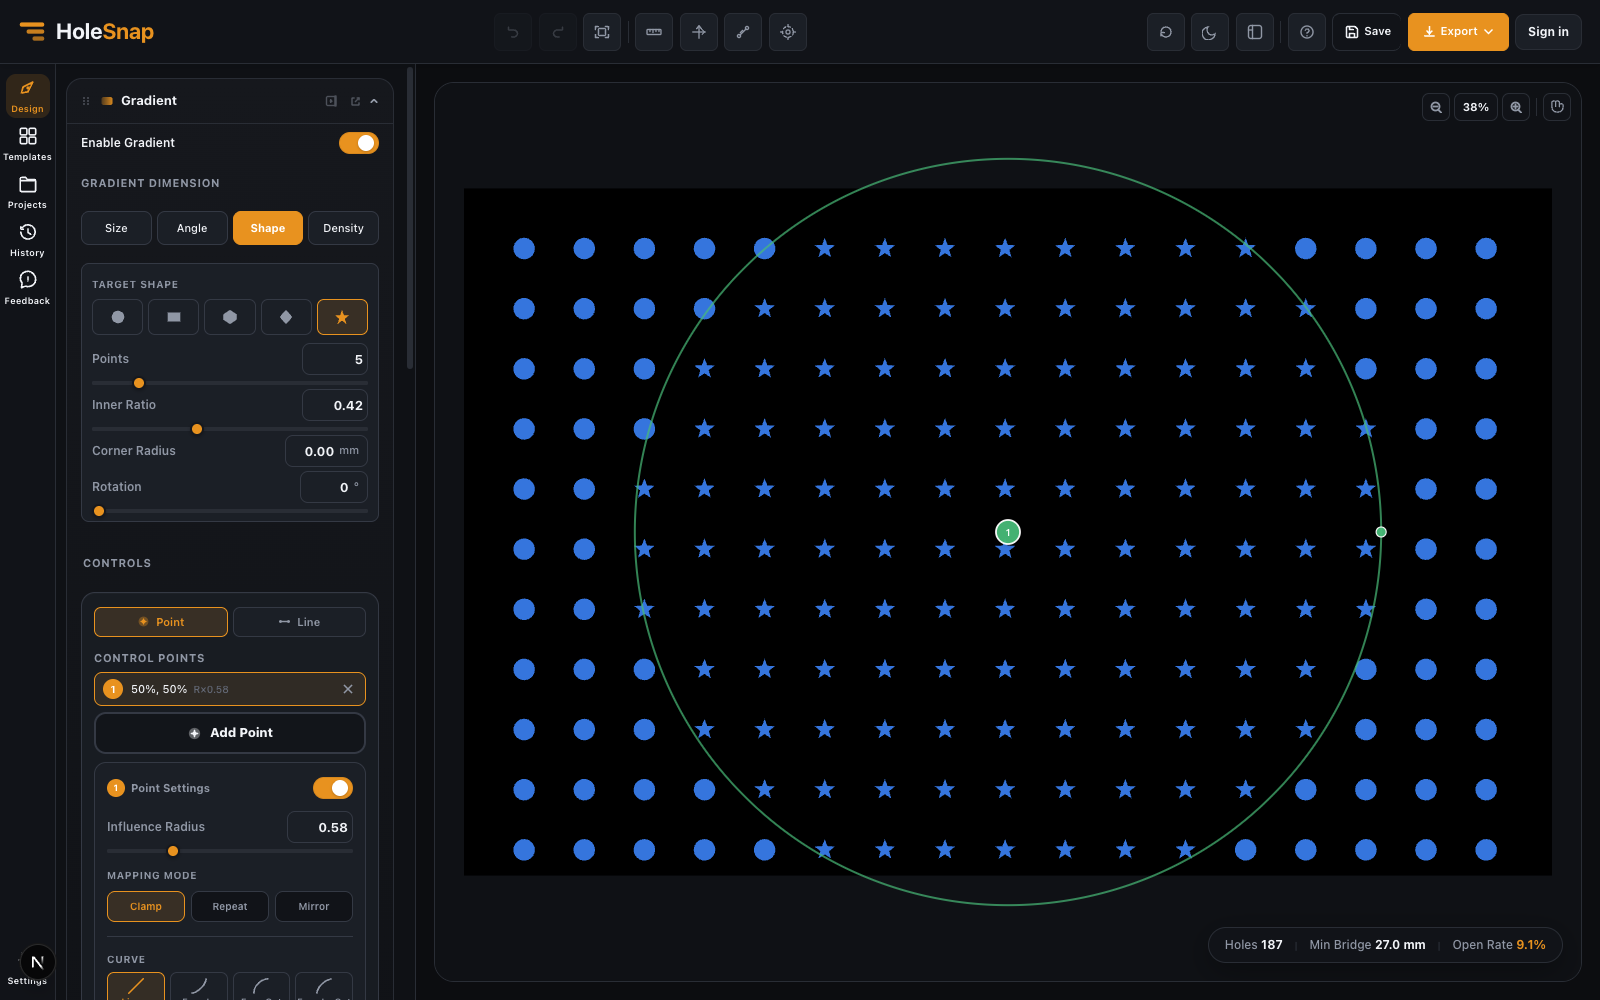
Create a Shape Gradient #
- Set the base shape in Shape & Style.
- Open Gradient.
- Turn on Enable Gradient.
- Choose Shape in Gradient Dimension.
- Select a Target Shape.
- Adjust target shape parameters such as aspect ratio, polygon sides, star points, corner radius, or rotation.
- Add a control point or gradient line.
- Adjust influence radius or range.
- Choose Clamp, Repeat, or Mirror.
Target Shape Parameters #
Depending on the selected target shape, you may see:
- Aspect Ratio for rectangles or diamonds.
- Polygon Sides for polygon targets.
- Star Points and inner ratio for star targets.
- Corner Radius for shapes that support rounded corners.
- Rotation for directional target shapes.
- Ring Inner Diameter for ring targets when available.
Use simple target shapes first. Decorative targets can increase file complexity.
Mapping Modes for Shape Gradients #
Clamp applies the target shape inside the influence area and returns to the base shape outside it.
Repeat creates repeated target/base zones.
Mirror alternates the transition direction and often creates a smoother repeated rhythm.
For most fabrication work, start with Clamp.
Fabrication Checks #
Before exporting a rotation or shape gradient, check:
- Minimum bridge width.
- Sharp corners.
- Small target shape details.
- Overlapping holes.
- Edge trimming.
- DXF complexity.
Shape gradients can make a design visually rich, but they can also create geometry that is harder to cut. If the exported file feels too complex, simplify the target shape or reduce hole count.


