Create a Size Gradient Pattern #
Overview #
A size gradient changes hole diameter across the panel while keeping the layout in place. It is one of the most useful gradient tools for decorative screens, ventilation panels, acoustic panels, product covers, and image-like perforation effects.
Use a size gradient when you want one area of the panel to feel more open, lighter, or more visually active than another area.
When to Use a Size Gradient #
Use this workflow for:
- Decorative panels where holes fade from large to small.
- Ventilation panels with stronger airflow in one zone.
- Product covers that need a visual highlight or soft transition.
- Laser-cut panels where every hole still needs enough bridge width.
- Early design studies before using image-based perforation.
Start with a Clean Base Pattern #
Before adding a size gradient, create a simple base pattern:
- Set the panel size in Canvas.
- Choose a base hole shape in Shape & Style.
- Pick a layout such as Grid, Staggered, or Hex.
- Set a spacing value that leaves enough material between holes.
- Check the live preview before enabling gradients.
A clean base pattern makes the gradient easier to understand. If the layout is already too dense, the gradient may create holes that are too large for fabrication.
Enable the Size Gradient #
- Open the Gradient panel.
- Turn on Enable Gradient.
- In Gradient Dimension, choose Size.
- Choose whether to work with Point or Line controls.
Use Point controls for radial effects, such as large holes near one area and smaller holes farther away.
Use Line controls for directional fades, such as left-to-right, top-to-bottom, or diagonal transitions.
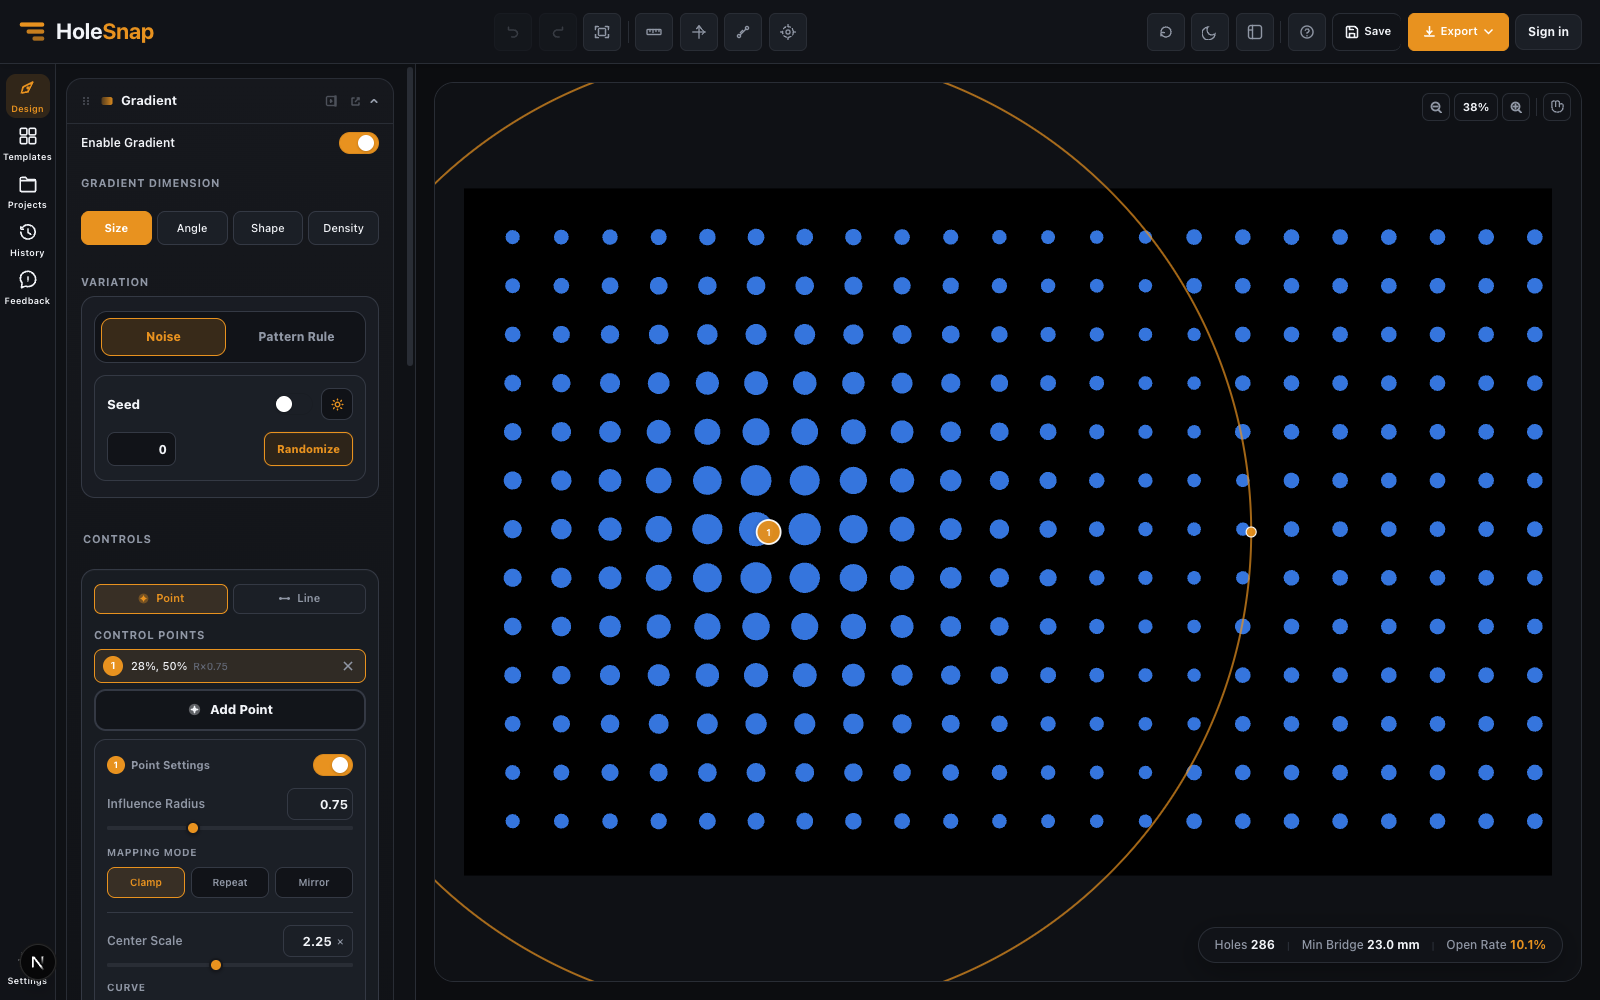
Create a Point-Based Size Gradient #
- In Controls, choose Point.
- Click Add Point.
- Place the control point on the canvas.
- Adjust Influence Radius to define how far the gradient spreads.
- Set Center Scale to control the hole size near the control point.
- Choose a Curve:
- Linear for an even transition.
- Ease In for a slower start and stronger change near the edge.
- Ease Out for a stronger change near the center.
- Ease In-Out for a softer transition at both ends.
- Use Reverse if the large and small areas are inverted.
For example, if your base hole is 10 mm and Center Scale is 2x, holes near the control point become approximately 20 mm before the gradient fades back to the base size.
Create a Line-Based Size Gradient #
- In Controls, choose Line.
- Click Add Line.
- Draw or place the gradient line on the canvas.
- Adjust Direction if you need a specific angle.
- Adjust Influence Range to control how wide the gradient band is.
- Set Center Scale for the size along the line.
- Choose Clamp, Repeat, or Mirror.
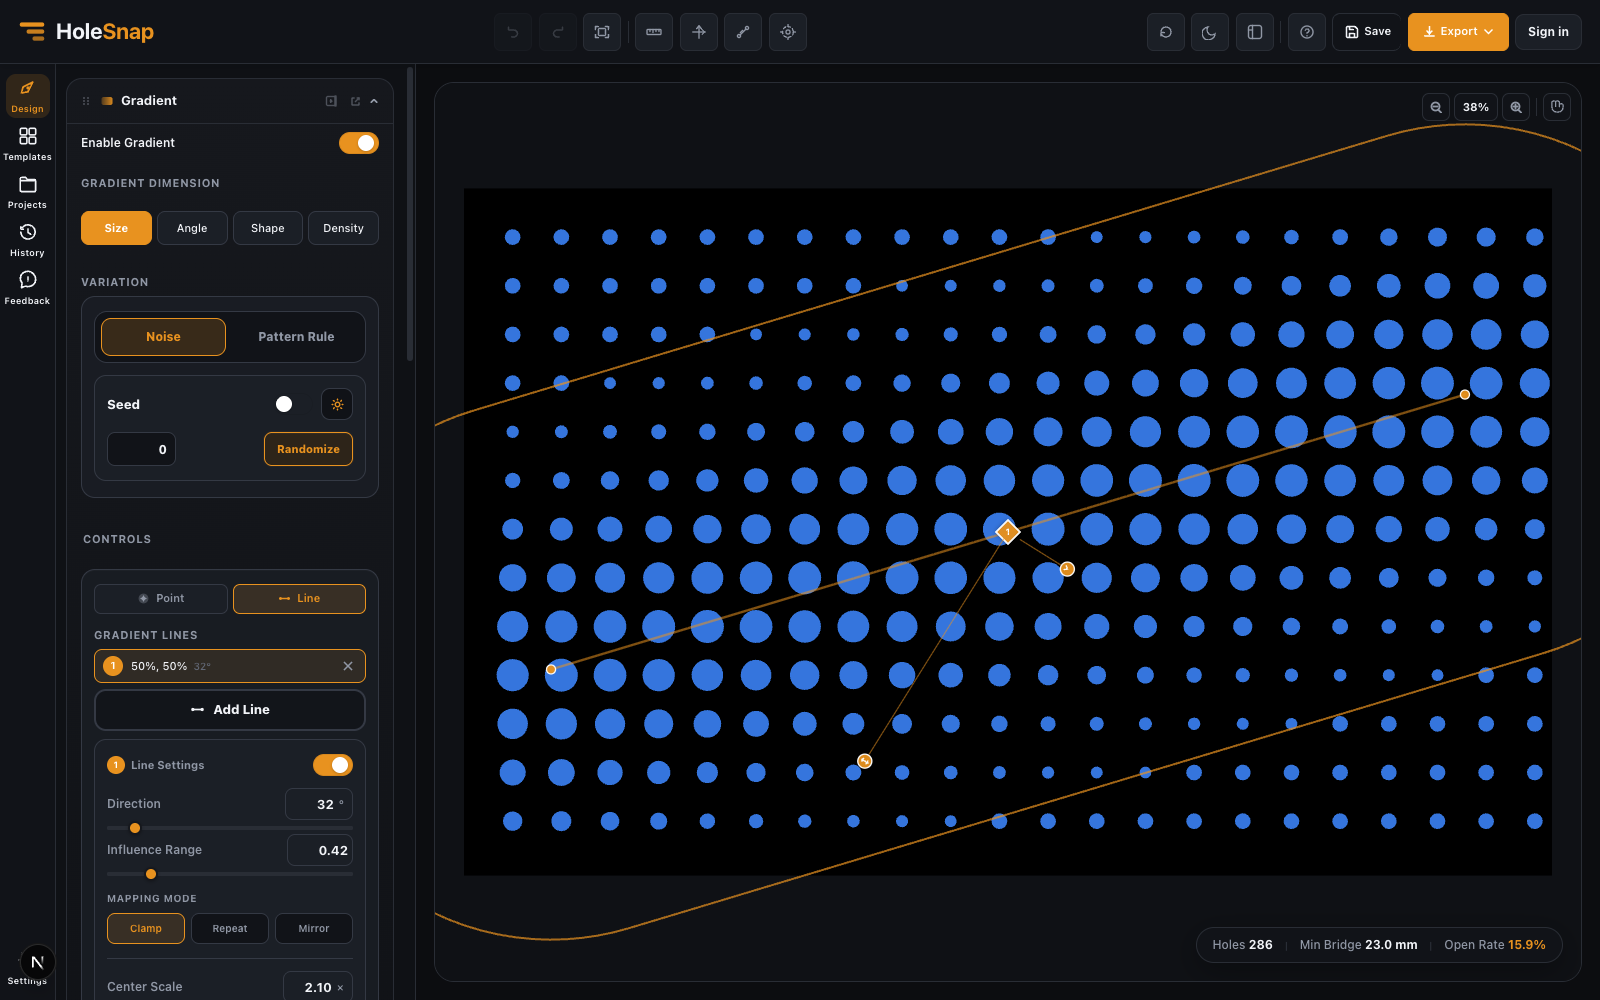
Line gradients are useful for panels that need a controlled direction, such as a fade from the top edge toward the bottom edge.
Mapping Modes #
Clamp keeps the gradient inside its influence radius or range. Outside that zone, the pattern returns to the base size.
Repeat repeats the gradient effect beyond the first influence zone. This is useful for rhythmic bands.
Mirror repeats the effect while alternating direction, creating a smoother wave-like rhythm.
Start with Clamp for most fabrication work. Use Repeat or Mirror when the effect is primarily decorative.
What to Check Before Export #
After creating a size gradient, check:
- Minimum bridge width between the largest holes.
- Open area, especially in the largest-hole zone.
- Holes near panel edges or boundaries.
- Whether very small holes are useful for the chosen fabrication process.
- DXF or SVG complexity if the panel has many holes.
Large holes can quickly reduce bridge width. Small holes may be difficult to cut cleanly depending on the material and machine.
Common Mistakes #
- Starting with a layout that is already too dense.
- Increasing Center Scale without checking bridge width.
- Adding multiple overlapping control points too early.
- Using Repeat or Mirror before understanding Clamp.
- Exporting before checking the largest-hole zone.
Next Steps #
After you understand size gradients, try Density Gradient for spacing-based variation or Rotation Gradient for directional decorative effects.


