
Create a Grid Pattern in Mesh Editor
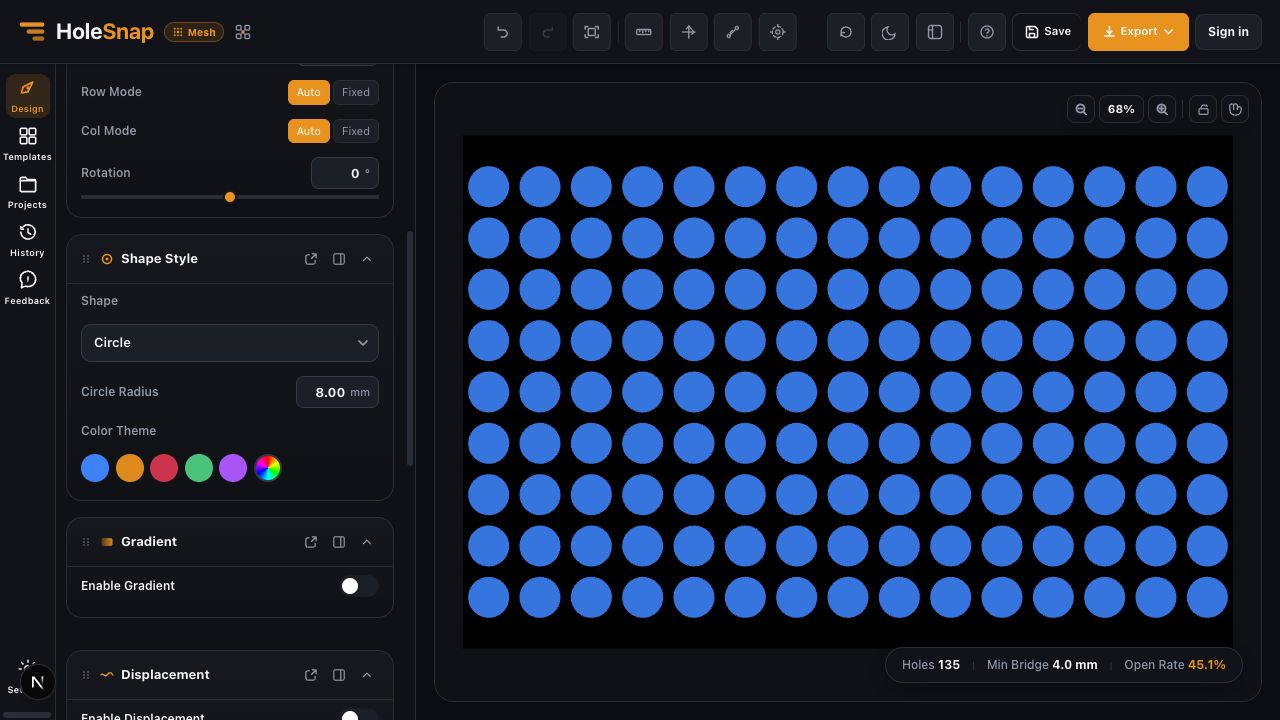
Use Grid when you need predictable rows and columns that are easy to measure and compare. This example uses a 300 × 200 mm Canvas, Circle Radius 8 mm, and a Square Grid with a 20 mm gap.
Steps
- Set the Canvas to
300mm Width and200mm Height. - In Shape Style, choose Circle and set Circle Radius to
8mm. - In Layout Mode, choose Regular, then Grid.
- Set Grid Type to Square.
- Set H Gap to
20mm. Square Grid applies the same spacing vertically. - Leave Row Mode and Col Mode on Auto so Mesh Editor fills the Canvas.
- Use Rotation only when the complete grid needs to turn inside the Canvas.
Check the Result
In the current build, this example produces 135 holes, a 4.0 mm minimum bridge estimate, and a 45.1% open rate. These values are useful for verifying that the tutorial state matches the screenshot; they are not manufacturing targets.
Fixed Rows or Columns
Switch Row Mode or Col Mode to Fixed only when you need to control the count directly. A fixed count can change edge spacing, so inspect all four sides after changing it.
Troubleshooting
- Openings overlap or bridge width becomes small: Increase H Gap or reduce Circle Radius.
- The pattern does not fill the Canvas: Confirm Row Mode and Col Mode are Auto.
- The grid is angled unexpectedly: Return Layout Rotation to
0°. - Edge spacing is uneven: Review fixed counts, Canvas dimensions, and Boundary margins.
Related Guides
- Layout Settings Overview
- How to Set Panel Size in Millimeters
- Choose a Hole Shape for Your Perforated Panel