Density Gradient Guide #
Overview #
A density gradient changes the spacing behavior of the pattern rather than only changing hole size. In HoleSnap, density gradients use a lens-like effect that pulls points closer together or pushes them farther apart.
Use density gradients when you want the pattern to feel denser in one area and more open in another area.
Density vs Size #
Size gradients change the hole diameter.
Density gradients change where holes are placed.
Both can affect open area and bridge width, but they do it differently. A size gradient makes individual holes larger or smaller. A density gradient changes the rhythm of the layout by moving holes closer or farther apart.
When to Use Density Gradients #
Use density gradients for:
- Decorative fade effects.
- Airflow zones that need more holes in one area.
- Product covers with visual emphasis.
- Acoustic panels with gradual pattern density.
- Designs where hole size should stay consistent but spacing should vary.
Enable a Density Gradient #
- Open the Gradient panel.
- Turn on Enable Gradient.
- In Gradient Dimension, choose Density.
- Choose Point for a radial density effect or Line for a directional density effect.
Density Gradient Strength #
The main control is Gradient Strength.
When the value is 1x, the distribution stays balanced.
Values below 1x create a tighter center and a sparser edge.
Values above 1x create a sparser center and a denser edge.
Use Reverse to flip the behavior.
Point-Based Density #
A point-based density gradient creates a local density zone.
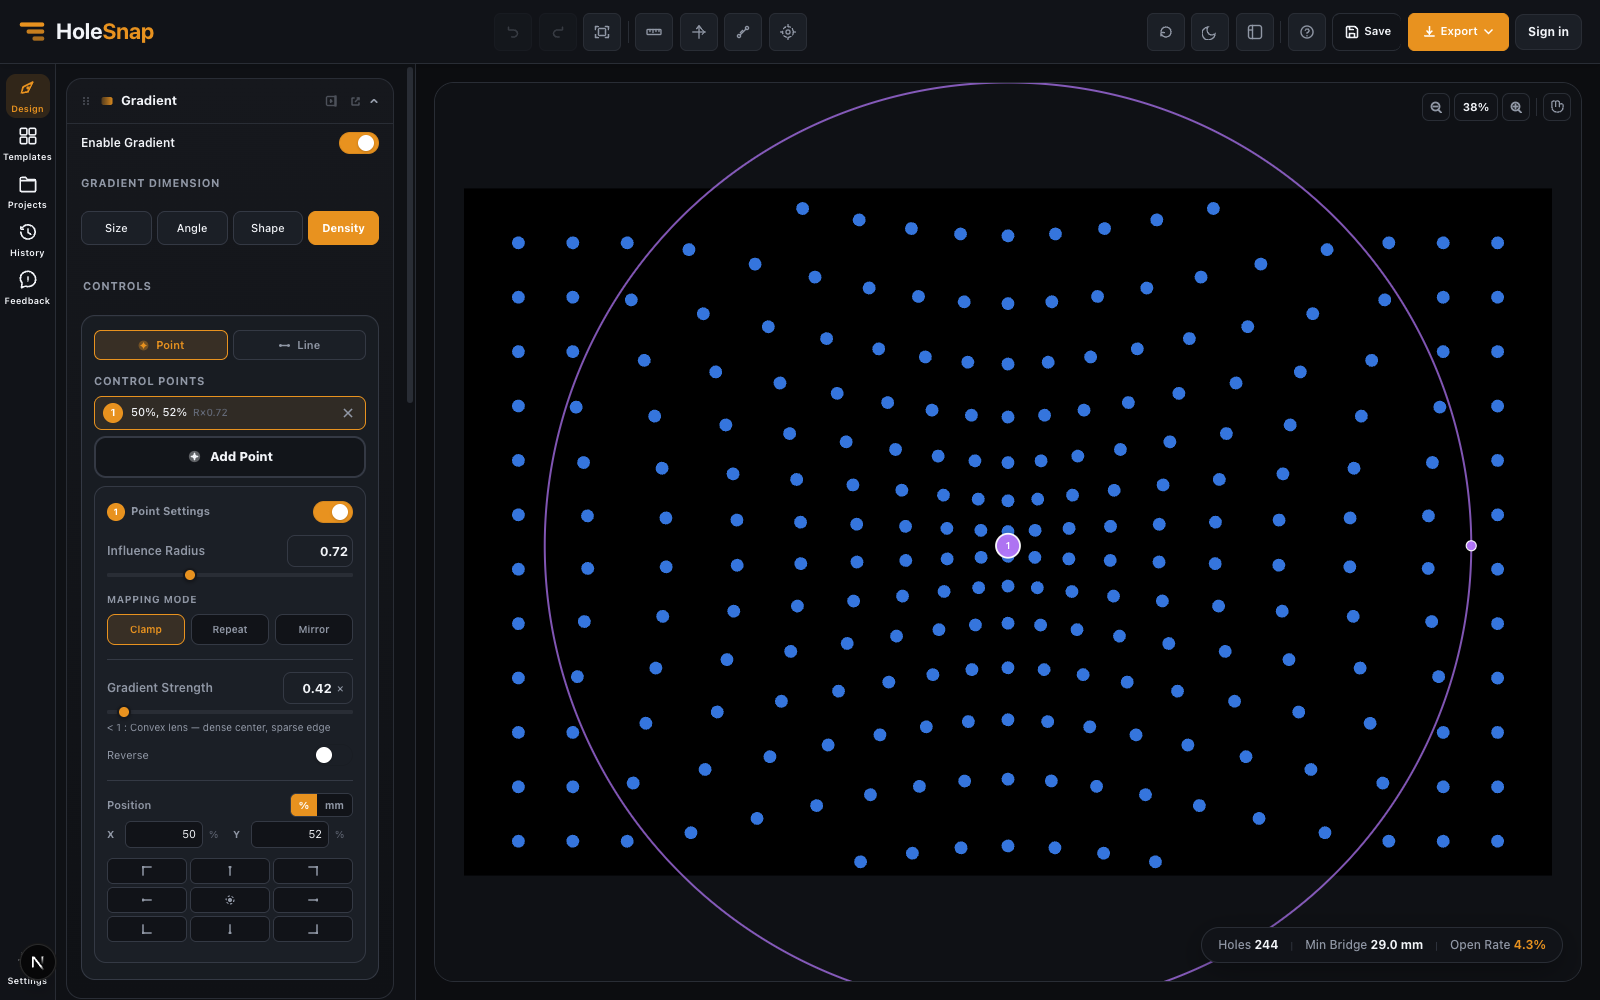
Use it when you want:
- Holes to gather near a focal point.
- A center-heavy pattern.
- A sparse center with denser outer area.
- A local visual effect around a logo, opening, or product feature.
Steps:
- Choose Density as the gradient dimension.
- Choose Point controls.
- Add a control point.
- Place it where the density effect should be centered.
- Adjust Influence Radius.
- Adjust Gradient Strength.
- Use Reverse if the center and edge behavior should swap.
Line-Based Density #
A line-based density gradient creates a band where points are pulled or pushed relative to the line.
Use it for:
- Directional density bands.
- Top-to-bottom or side-to-side transitions.
- Decorative waves of density.
- Controlled airflow zones across a rectangular panel.
Steps:
- Choose Density as the gradient dimension.
- Choose Line controls.
- Add a line.
- Set its direction.
- Adjust Influence Range.
- Adjust Gradient Strength.
- Choose Clamp, Repeat, or Mirror.
Fabrication Checks #
Density gradients can create zones where holes become too close together. Always check:
- Minimum bridge width.
- Overlapping holes.
- Open area in the dense zone.
- Holes near panel boundaries.
- Whether the final DXF has too many small close features.
If the dense zone is too tight, increase spacing, reduce the density strength, reduce hole size, or expand the influence range.
Density Gradient vs Image to Perforation #
Use density gradients when you want manual, controllable pattern variation.
Use Image to Perforation when you want a pattern based on an uploaded image, logo, or graphic.
Density gradients are better for simple design direction. Image to Perforation is better for image-like tone mapping.


