Perforated Aluminum Facade Panels: Design a Custom Pattern Online
Create custom perforated aluminum facade panel concepts online. Set the panel size, hole shape, spacing, density, open rate, and edge treatment, then export SVG, DXF, or STP for presentations and downstream design workflows.
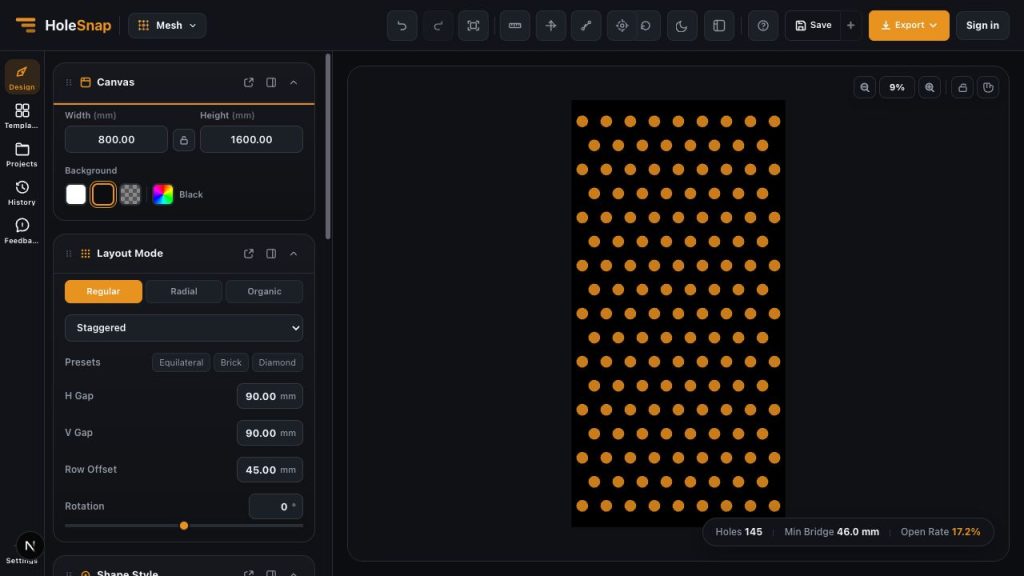
Perforated aluminum facade panels combine a practical screen with a visible design surface. The same panel can manage sunlight, airflow, privacy, weight, and visual identity while giving a building or product a distinct visual language.
HoleSnap Mesh gives you a browser-based way to generate those visual directions quickly. Set the working area, choose a hole shape, control the layout and spacing, compare density variations, and export SVG, DXF, or STP files when you want to take a selected direction further.
The result is useful for facade studies, client presentations, material concepts, product surfaces, and pattern development. You can create several convincing options in minutes instead of redrawing each version by hand.
Where Perforated Aluminum Panels Are Used
Custom perforated panels can be used in many architectural and product-facing situations:
- Exterior facade screens and rainscreen feature panels
- Sunshades and solar-control screens
- Balcony, terrace, and privacy screens
- Parking garage and service-area facades
- Ventilation covers and plant-room screening
- Interior feature walls, ceiling panels, and wayfinding surfaces
The right pattern depends on the job. A dense pattern can create a more private visual layer, while a more open pattern can make a surface feel lighter and more transparent. HoleSnap makes it easy to compare those directions side by side before choosing a concept.
What to Decide Before You Start
Start with a visual direction rather than a finished specification. A few simple choices are enough to create the first useful concept:
- A tall facade panel, wide sunshade, square feature wall, or privacy screen
- A regular, staggered, hexagonal, radial, or variable pattern rhythm
- A hole language such as circle, rectangle, diamond, or polygon
- A light, medium, or dense visual texture
- A clean rectangular edge, a custom boundary, or a solid border
These choices give you a strong starting point without slowing down the exploration. You can change the proportion, spacing, and density as soon as you see the first preview.
Step 1: Set the Working Panel Size
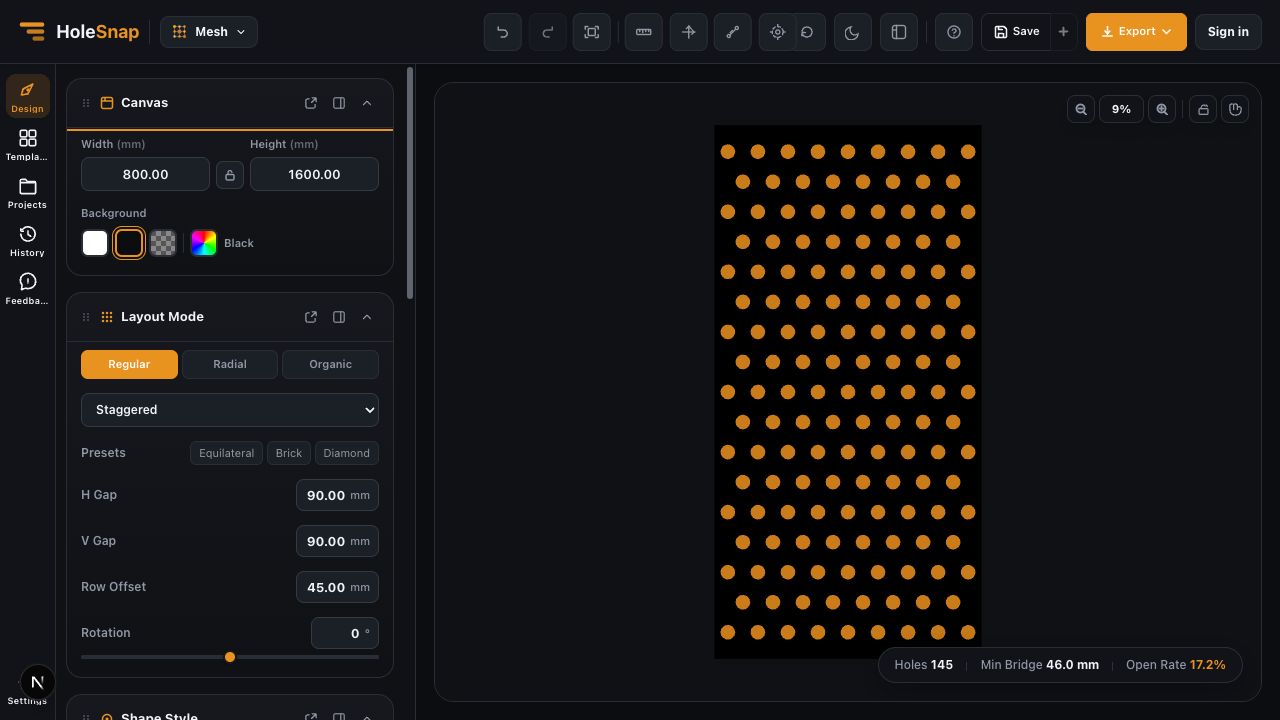
Open HoleSnap Mesh and start in the Canvas panel. Enter the panel width and height in millimeters. The example below uses an 800 × 1600 mm working area so the pattern can be evaluated as a tall facade or privacy-screen panel.
The canvas is the design area for the pattern. Match it to the target panel when you want a realistic composition, or use a smaller test panel when comparing hole shapes and spacing. This makes it easy to switch between tall facade studies, wide screens, square feature panels, and smaller product surfaces.
Step 2: Choose a Layout and Hole Shape
In Layout Mode, choose Regular for a controlled grid, then choose the layout that best matches the panel concept. Staggered is a useful starting point for facade work because each row is offset, creating a more continuous visual rhythm than a simple square grid.
Use the visible controls to tune the structure:
- H Gap controls the horizontal distance between pattern positions.
- V Gap controls the vertical distance between rows.
- Row Offset controls how far the alternating rows shift.
- Rotation changes the orientation of the repeated pattern.
For the repeated geometry, open Shape Style and choose a shape such as Circle, Rectangle, Diamond, or Polygon. Circular holes are a familiar starting point for punched sheet, while rectangles and diamonds can create a more directional facade texture. Keep the shape simple until the spacing and edge behavior are working.
Start with a generous bridge between holes. You can reduce the spacing later, but a pattern that begins too dense may create small bridges, crowded edges, and a weak visual hierarchy.
Step 3: Use Density Variation to Control the Surface
A facade does not have to use the same apparent density everywhere. A uniform pattern can be appropriate for a ventilation screen or a technical enclosure. A controlled variation can create a softer transition, a focal area, or a privacy gradient.
In Gradient, enable the gradient and select Density. The editor exposes a seed and noise-strength control so you can compare variations without manually editing every opening. Use the preview to judge the overall rhythm, then compare the live Holes, Min Bridge, and Open Rate values in the status bar.
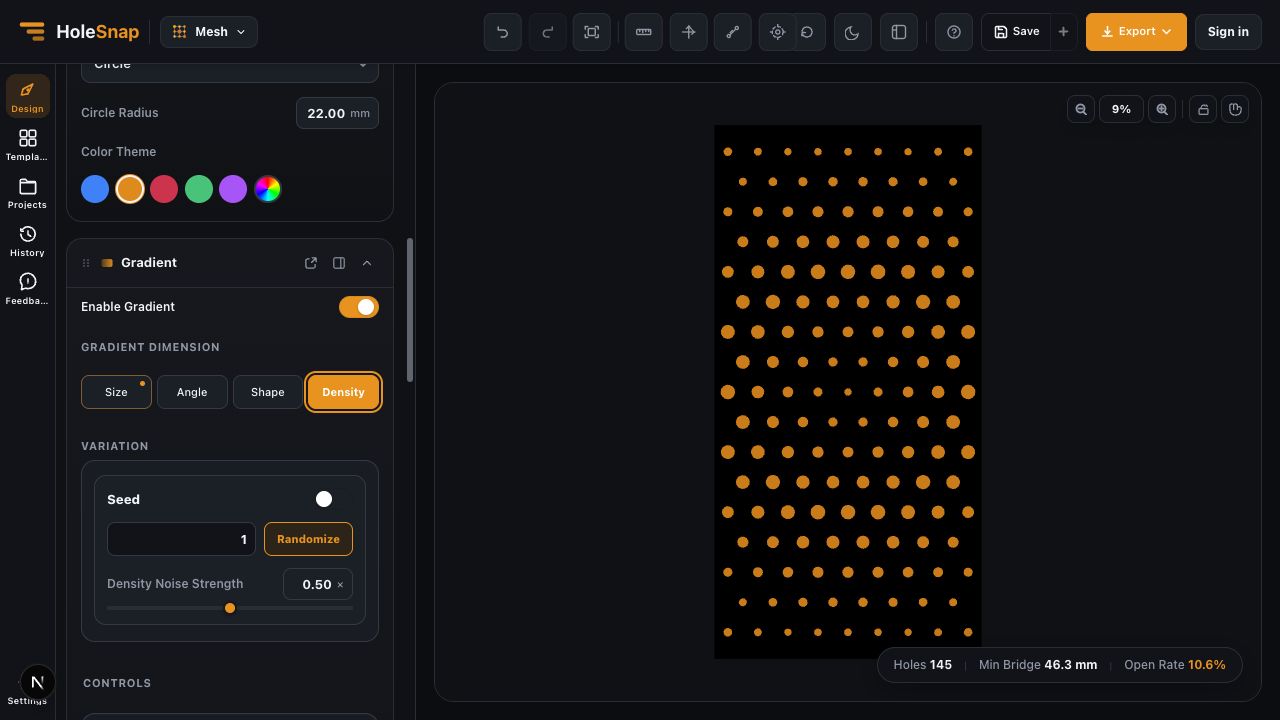
The live values make visual comparison faster. A higher open rate can make a panel feel lighter and more transparent, while a lower open rate can create a stronger screen effect. Try several combinations and save the variations that best match the intended facade, shade, privacy, or decorative application.
Step 4: Protect Edges and Fixed Areas
Pattern geometry should not run through every part of the panel automatically. Leave room for the features that make the panel installable:
- Folded or reinforced edges
- Mounting holes and brackets
- Panel seams and support rails
- Access hatches and service openings
- Corners, returns, and areas that need solid material
Use Mesh’s Boundary controls to decide how the pattern meets a rectangular, circular, or custom boundary. Hide can remove points outside the boundary while preserving the underlying layout. Trim can cut the pattern to the boundary. Switch between the modes and inspect the perimeter at a useful zoom level to find the cleanest visual edge.
This is especially useful when the same pattern needs to become a tall facade screen, a rounded feature panel, or a graphic border. Keep the boundary simple while exploring, then add any project-specific solid areas or mounting details in the next design stage.
Step 5: Review the Pattern Before Export
Before exporting, use the preview and status bar as a short design review:
- Check that the panel has the intended aspect ratio.
- Confirm that the hole shape and row rhythm match the visual direction.
- Look for crowded openings or unusually narrow bridges near the perimeter.
- Compare the Open Rate with the project’s daylight, airflow, privacy, or visual-density goal.
- Confirm that solid areas remain around mounting and reinforcement zones.
- Zoom in on corners and boundary transitions.
- Save the canvas size and key spacing values for the version you want to reuse.
The Min Bridge value is a quick visual reference for comparing pattern options. Use it together with the preview to spot areas that look too crowded or too delicate, then choose the version that best fits the intended application.
Step 6: Export SVG, DXF, or STP
When the pattern is ready to share or develop further, open Export. HoleSnap Mesh presents SVG, DXF, and STP options together with the output size. Choose the format that fits the next step:
- SVG is useful for graphic editing, layout studies, and vector workflows.
- DXF is a practical handoff format for many CAD/CAM, laser-cutting, and CNC workflows.
- STP or STEP is useful when the pattern needs to continue into a 3D CAD review.
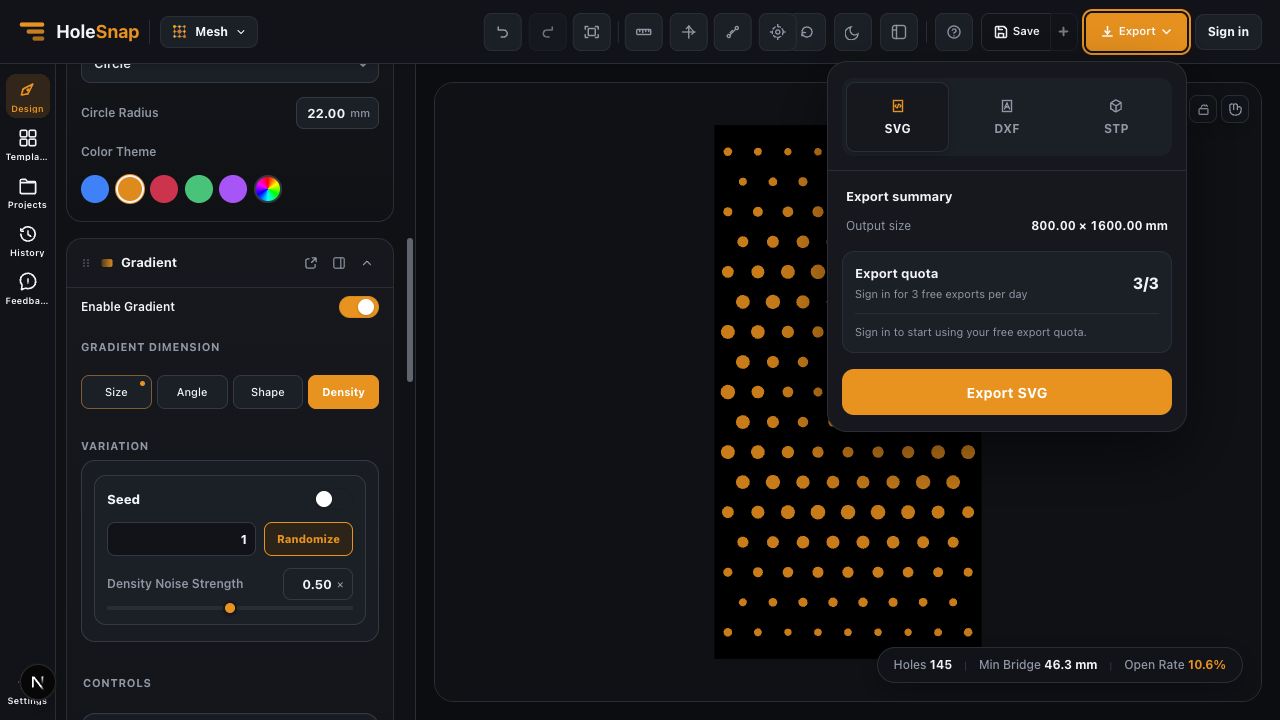
The export panel shows the output size and the current export quota. Sign in when the editor asks for an export entitlement, then download the selected format. You can use the exported file in a presentation, layout study, CAD workflow, laser-cutting concept, or product development handoff.
Turn One Pattern into Several Applications
Once you have a strong pattern direction, reuse it across different visual applications:
- A tall facade screen for a building entrance or parking structure
- A perforated sunshade with a denser upper area and a lighter lower area
- A balcony or terrace privacy panel with a controlled density gradient
- A feature wall with a logo, symbol, or custom color treatment
- A ventilation cover for equipment rooms and service areas
- A product enclosure, room divider, ceiling panel, or decorative screen
The same HoleSnap workflow can produce a clean regular pattern, a staggered panel, a hexagonal texture, or a more expressive density variation. Change the canvas ratio, spacing, hole shape, and color to create a new application without rebuilding the concept from zero.
A Practical Starting Workflow
For a first facade pattern study, use this sequence:
- Set the target panel width and height in Canvas.
- Choose Regular and start with Staggered or Hex.
- Select a simple circle or rectangle in Shape Style.
- Increase H Gap and V Gap until the bridges are comfortably visible.
- Compare a uniform pattern with a Density variation.
- Reserve solid edges and fixed mounting areas with Boundary.
- Review Holes, Min Bridge, and Open Rate.
- Export SVG, DXF, or STP and place the selected direction into a presentation or downstream design workflow.
Final Takeaway
Perforated aluminum facade design becomes easier to discuss when the pattern is adjustable. Instead of redrawing several options by hand, you can compare hole shapes, staggered layouts, spacing, density, and edge treatment in one browser workflow. That makes HoleSnap useful for facade concepts, product screens, sunshades, privacy panels, and decorative applications.
Start with a clear panel boundary, build a few variations, and use the preview to show how the pattern behaves in a real application. That fast visual loop is the main advantage: one adjustable pattern can become many facade, screen, shade, and product concepts.