Image to Perf for Perforated Facade Design | HoleSnap
Turn a city silhouette into a perforated facade concept with HoleSnap Image to Perf. Compare pitch, hole size, layout, open rate, and DXF export checks.
How to Turn a City Silhouette into a Perforated Facade
Perforated metal panels can filter sunlight, soften street views, support airflow, and give a building a recognizable graphic identity. HoleSnap Image to Perf is an image-to-perforation workflow for testing perforated facade panels before CAD/CAM review. Designers can compare image scale, spacing, hole size, layout, and open area before handing a direction to engineering and fabrication.
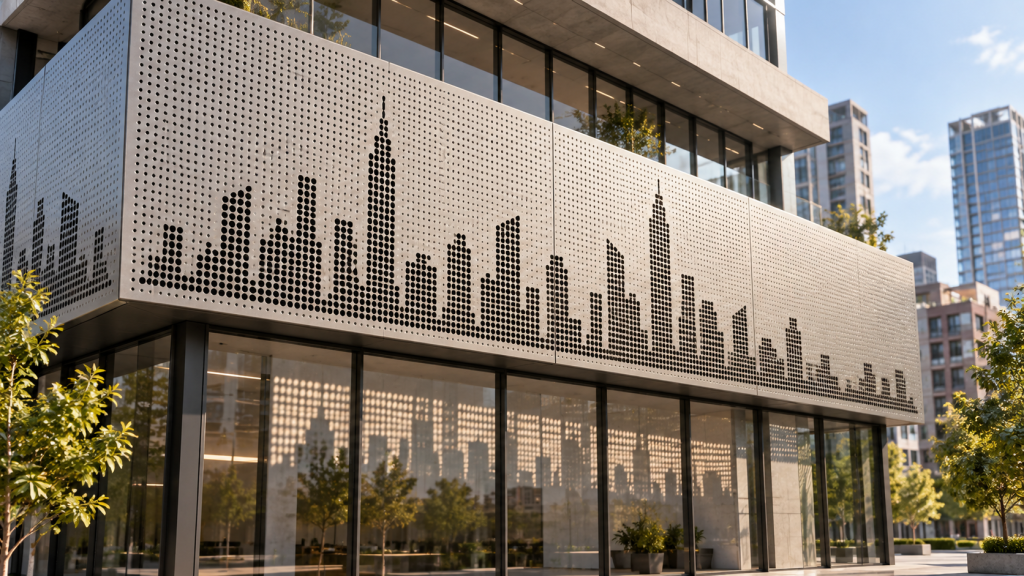
A concept visualization shows how the same direction could read as a perforated second skin: the panel carries the skyline, while daylight and shadows make the pattern visible from inside and outside. This is a scene study, not a photograph of a completed project or a substitute for the tool preview.
Where does this image-to-perforation workflow fit?
A wide city silhouette works especially well for long, horizontal surfaces. It can be explored as:
- a second-skin facade or balcony screen;
- a sun or privacy screen facing a street, courtyard, or terrace;
- a feature wall or metal panel for a hotel, campus, exhibition space, or public interior.
The preview is a design study, not a completed construction detail. Material thickness, structure, drainage, fire performance, and installation still need project-specific review.
From an image to a perforated panel
1. Start with a clear source image
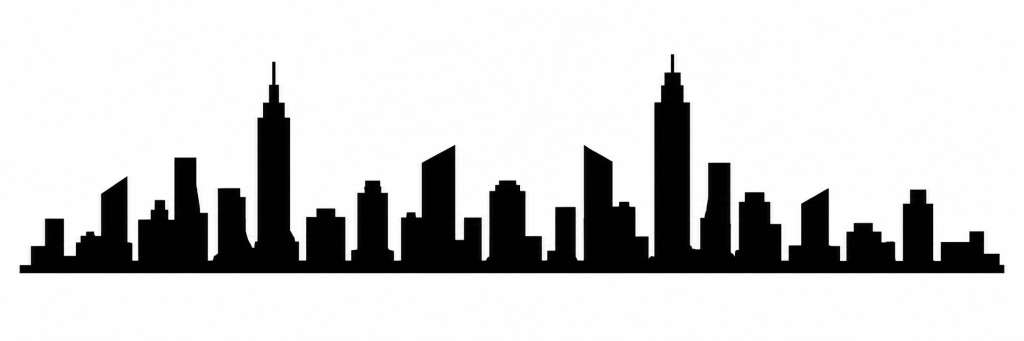
Complex photographs often contain more information than a panel needs. A high-contrast skyline, building silhouette, or simplified graphic usually produces a more legible result. Remove unnecessary background noise and keep the main contour easy to recognize.
2. Set the real canvas size
Enter the panel width and height in Canvas and keep the units in millimeters. A small decorative screen and a 4-meter facade panel should not use the same pitch or hole size. The browser preview is a design surface; it does not replace a full-scale fabrication check.
3. Choose a layout, then compare variations
Use Scene Presets as a starting point when the panel has a clear purpose. Building Facade is a useful reference for large continuous graphics, while Laser Cutting, Vent Panel, and Acoustic Panel suggest different priorities for fabrication, airflow, or sound-related concepts.
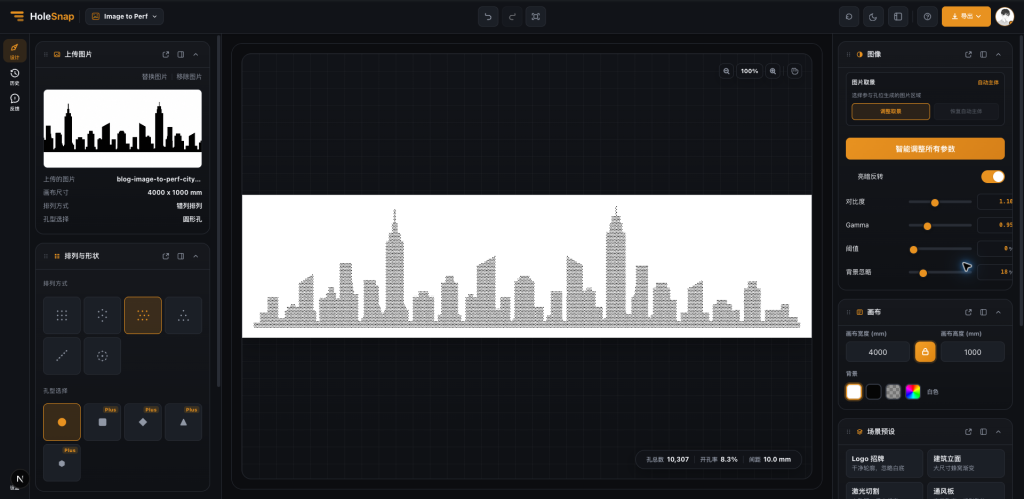
The real tool screenshot shows a 4000 × 1000 mm canvas with a Staggered layout and circular holes. At a 10 mm pitch, the preview contains 10,307 holes and an 8.3% open rate. These values are useful for comparing scale and visual density; they are not a fixed production recipe.
Which controls matter most?
- Pitch sets the spacing between holes and strongly affects hole count, visual resolution, and file complexity.
- Min/Max Diameter control the range of hole sizes and the contrast of the image on the panel.
- Density, Contrast, Gamma, and Threshold help simplify or strengthen the image before it becomes geometry.
- Grid, Hexagonal, and Staggered layouts change the rhythm of the surface and the way light passes through it.
For a privacy or sun screen, inspect the panel from the distance at which it will be experienced. For a sign or feature wall, zoom in and check whether the skyline remains readable at the edges.
Export and handoff
Use PNG for presentations, SVG for vector editing, and DXF when the next step is CAD/CAM or laser-cutting preparation. Before export, review Export Checks and then confirm units, scale, closed paths, minimum bridge width, and edge clearance in the receiving workflow.
Image to Perf solves the first design question—how to turn an image into adjustable perforation geometry. It does not replace structural, acoustic, ventilation, material, or code validation. That separation makes it useful early in the process: establish a visual direction quickly, then carry a controlled geometry into technical review.
For repeatable decorative screens and image-led interior panels, see HoleSnap Pattern.