Polar Array Pattern Generator: Create Radial DXF Layouts Online
Create circular, radial, sector, fan guard, and speaker grille patterns with HoleSnap’s new Polar Array layout, then export SVG, DXF, or STP files for fabrication workflows.

HoleSnap now supports Polar Array, a new radial layout mode for creating circular and sector-based vector patterns directly in the browser.
Instead of building a circular pattern manually in CAD, you can choose a radial layout, control ring count, point distribution, radius, angle range, twist, orientation, and center clearance, then export the result as SVG, DXF, or STP for design and fabrication workflows.
This is useful for speaker grilles, fan guards, circular ventilation panels, radial decorative screens, product front panels, laser-cut round inserts, and CNC or sheet metal prototypes.

What Is a Polar Array?
A polar array places repeated shapes around a center point. Instead of using rows and columns, the pattern is organized by radius and angle.
In a perforated panel workflow, that means you can create rings of holes, increase points on outer rings, build sector-only fan openings, use tangential slots for airflow direction, and keep a center clearance for a hub, screw, logo, motor shaft, or speaker dome.
This kind of layout is hard to tune with a regular grid. Polar Array gives you direct controls for the circular structure, so you can iterate visually before exporting a fabrication-ready file.
Step 1: Select Polar Array in Layout Mode
Open the HoleSnap editor and go to the Layout settings. Under the radial layout group, choose Polar Array.
The editor switches from a rectangular grid to a circular pattern system. You can still use the same shape controls, color preview, canvas size, and export workflow, but the placement logic now follows rings and angles.
For a simple circular perforated panel, start with round holes. For fan guards or directional vents, try slots or elongated shapes.
Step 2: Start with a Polar Array Preset
Polar Array includes presets for common radial pattern types. Use them as a starting point, then adjust the values for your part.
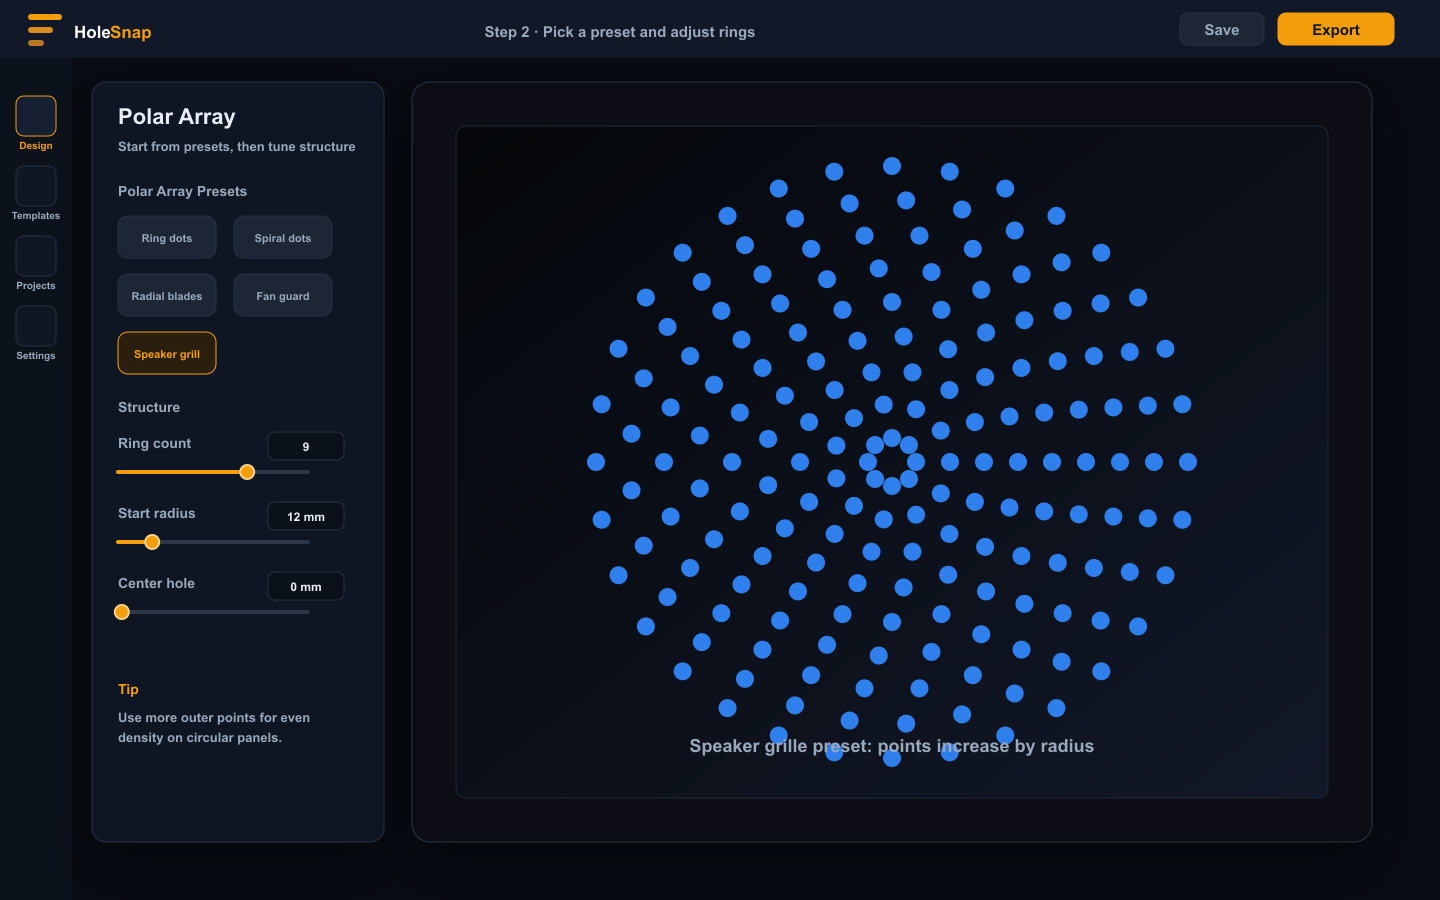
Typical presets include ring dots, spiral dots, radial blades, fan guard, and speaker grille layouts. Presets are useful because radial layouts have several connected values. A speaker grille usually needs more points on the outside rings. A fan guard often needs a center hole and a sector angle range.
Step 3: Adjust Rings, Radius, and Point Distribution
The most important Polar Array controls are ring count, start radius, center hole radius, points per ring, by-radius point distribution, and manual point sequences such as 6,12,16,20,24.
For fabrication work, avoid thinking only about visual density. Also check the minimum bridge width between holes. If the outer rings become too dense, reduce point count, increase the panel size, or use smaller holes.
Step 4: Use Sector Mode for Fan Covers and Directional Vents
A full polar array creates a complete circular pattern. Sector mode limits the pattern to an angle range, which is useful for fan covers, partial vents, decorative arcs, or product surfaces where only part of a circle should be perforated.
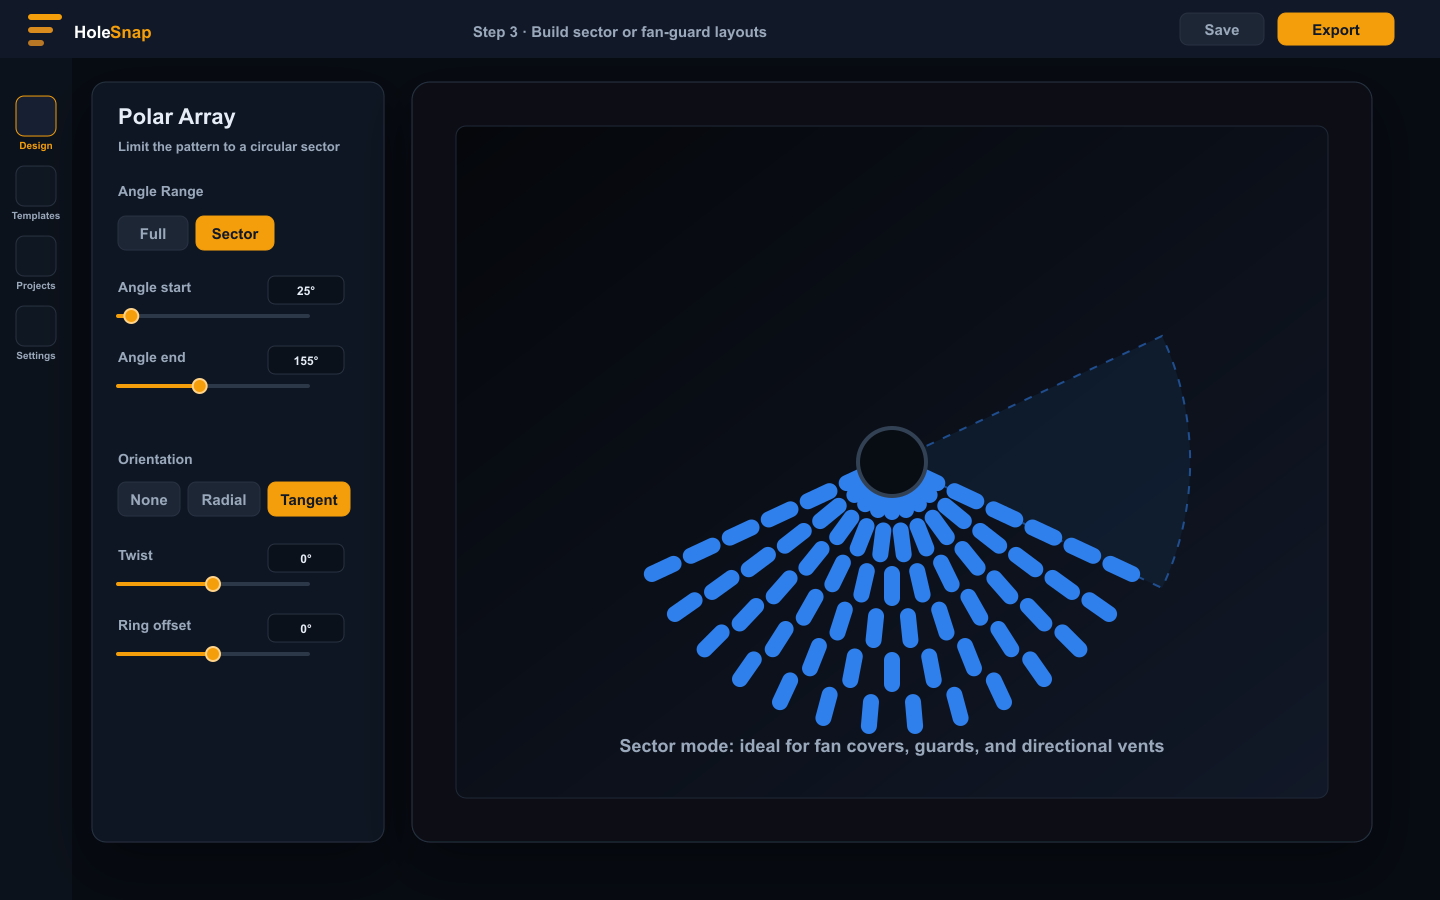
Use angle start and angle end to define the sector. Orientation mode controls whether shapes stay fixed, point outward, or follow the tangent direction. Twist and ring angle offset create motion between inner and outer rings.
For fan guard designs, tangent orientation can make slots follow the circular airflow direction. For radial decorative patterns, radial orientation can make shapes point away from the center.
Step 5: Check the Center and Outer Edge
Before exporting, inspect the center region and the outer boundary. The center often needs clearance for hardware, branding, bearings, speaker domes, screws, or structural material. The outer boundary needs enough material between the last ring and the panel edge.
If the pattern feels too crowded, adjust start radius, center hole radius, ring count, points per ring, hole size, canvas size, or angle range.
Step 6: Export SVG, DXF, or STP
When the polar array looks ready, use the export menu to download the file.
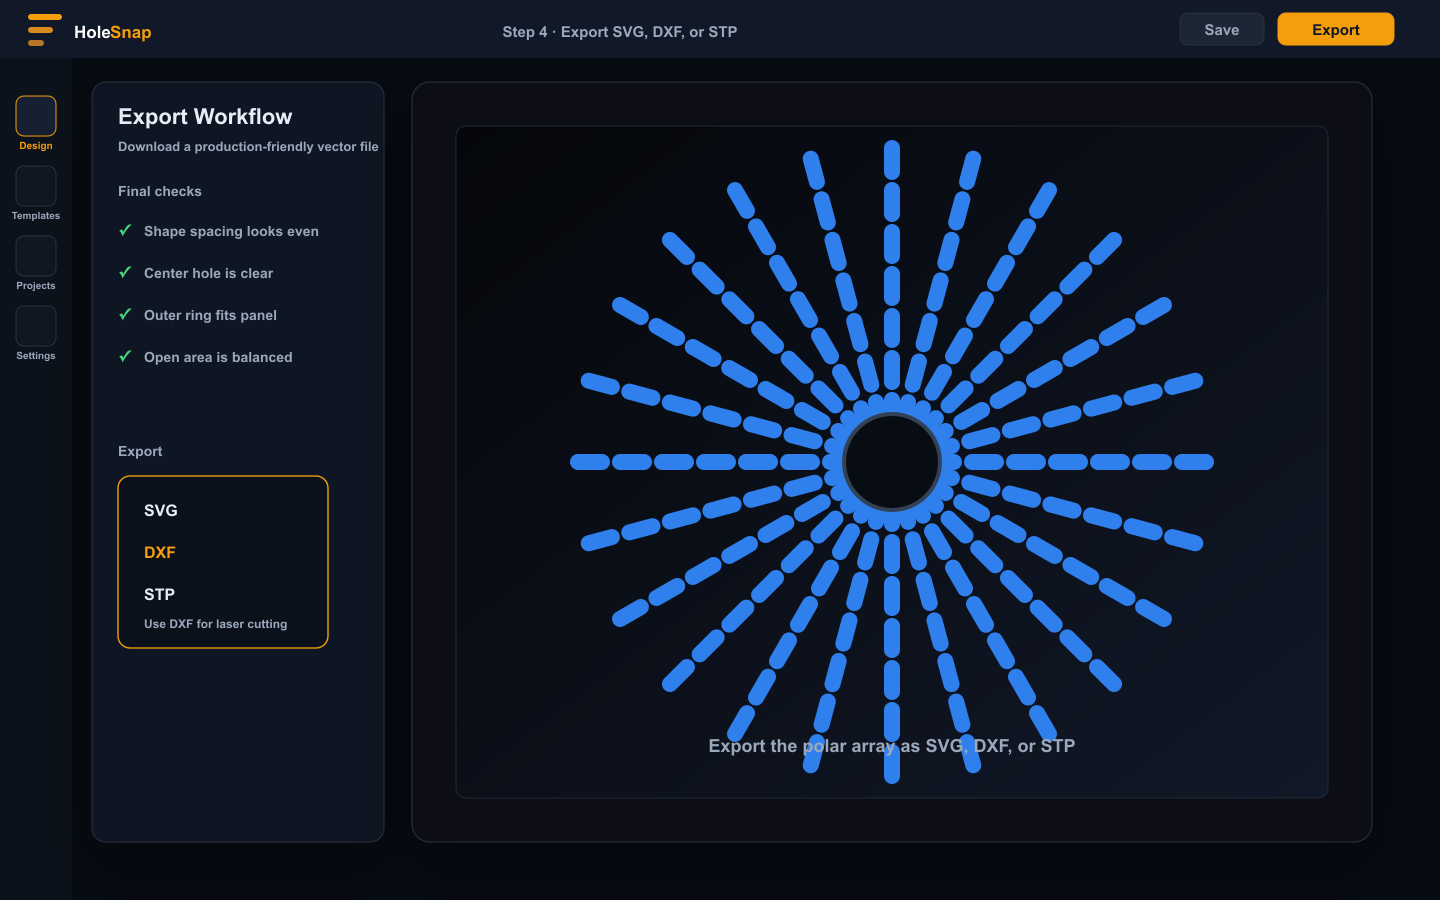
Use SVG for vector design and lightweight editing, DXF for laser cutting, CNC, CAD/CAM review, and sheet fabrication, or STP for 3D CAD workflows and downstream product development.
After exporting, open the file in your CAD/CAM software and check scale, units, closed contours, duplicate lines, minimum spacing, and manufacturing constraints.
Why This Matters
Polar Array expands HoleSnap from rectangular perforation layouts into radial pattern generation. That makes the editor more useful for circular products, vents, speaker covers, fan guards, and decorative fabrication work.
HoleSnap is a vector pattern generator for design and fabrication workflows. With Polar Array, you can create radial patterns in the browser, preview the result visually, control the geometry that matters, and export clean SVG, DXF, or STP files for the next step.
Try it in the editor: HoleSnap Editor